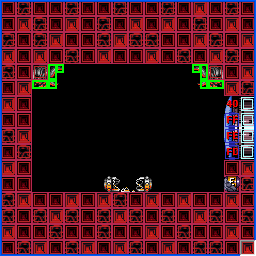
Difference between revisions of "Ridley Tank Room"
From A complete guide to Super Metroid speedrunning
m |
m |
||
| Line 1: | Line 1: | ||
| + | {{Infobox room | ||
| + | |zone = Lower Norfair | ||
| + | |subzone = East | ||
| + | |hazard = Heated | ||
| + | |hidden = 1 | ||
| + | }} | ||
{{Adjacent rooms | {{Adjacent rooms | ||
|east=[[Ridley's Room]] | |east=[[Ridley's Room]] | ||
| Line 20: | Line 26: | ||
* [[List of Energy Tanks#Norfair 4|Norfair Energy Tank 4]] | * [[List of Energy Tanks#Norfair 4|Norfair Energy Tank 4]] | ||
| − | |||
| − | |||
Latest revision as of 03:12, 28 November 2023
| Ridley Tank Room | |||
|---|---|---|---|
| Zone | Lower Norfair | ||
| Subzone | Lower Norfair/East | ||
| Hazard | Heated | ||
| Items |
| ||
| Adjacent rooms | Ridley's Room | |
|---|---|---|
Any%
Higher-level runners will often skip this e-tank in PB attempts, instead relying on Ridley's drops to get them out of Lower Norfair.
In a race environment however, this e-tank can be valuable. A runner who's taking their time in the Lower Norfair escape in order to survive might waste more time than if they had taken the e-tank, and then just taken the hits from the Kihunters along the way.
100%
If you jump from this room through Ridley's Room, that can save some time over walljumping up from the Ridley's platform.
