Difference between revisions of "Lower Norfair Fireflea Room"
(Speculation about X-Raying the wall, and a video showing how it looks solid) |
(→Any%: Cutie's Any% strat video) |
||
| (One intermediate revision by the same user not shown) | |||
| Line 9: | Line 9: | ||
{{#ev:youtube|L3T8aNYT6oE}} | {{#ev:youtube|L3T8aNYT6oE}} | ||
| + | |||
| + | == Any% == | ||
| + | |||
| + | If you have a beam charged as you move through this room, that will allow you to [[pseudo-screw]] through all of the flames, and then into the final [[Boulder]] to destroy it. | ||
| + | |||
| + | If you [[downgrab]] the ledge before the final boulder, that will avoid bringing the last [[Fune]] on screen early, giving you enough time to get up in time to avoid its flame. | ||
| + | |||
| + | {{#ev:youtube|I1WYZqSjdJU}} | ||
| + | |||
| + | An easier but slower strat dodges the flames and boulders, and freezes the final Fune when you're directly below it. | ||
== Items == | == Items == | ||
* [[List of Energy Tanks#Norfair 3|Norfair Energy Tank 3]] | * [[List of Energy Tanks#Norfair 3|Norfair Energy Tank 3]] | ||
Revision as of 02:20, 13 January 2021
| Lower Norfair Spring Ball Maze Room Red Kihunter Shaft |
Adjacent rooms | Lower Norfair Escape Power Bomb Room |
|---|---|---|
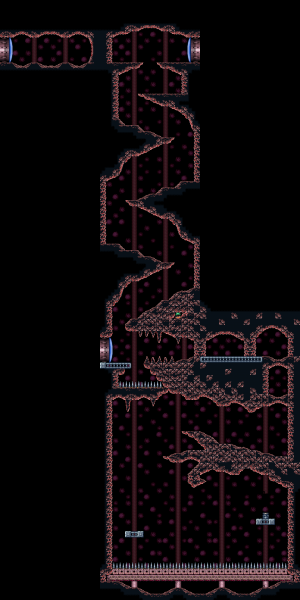
The false wall at the top of the room shows as if it was solid with the X-Ray Scope, so some players doing blind playthroughs trust that the wall is solid, and end up exiting Lower Norfair through the elevator, which requires diving into the acid in Amphitheatre. Some in the community have speculated that the wall was transparent with X-Ray during the design and playtest stages, but then they added the Firefleas late in development. The two visual effects don't work properly together, and as a result the wall looks solid.
Any%
If you have a beam charged as you move through this room, that will allow you to pseudo-screw through all of the flames, and then into the final Boulder to destroy it.
If you downgrab the ledge before the final boulder, that will avoid bringing the last Fune on screen early, giving you enough time to get up in time to avoid its flame.
An easier but slower strat dodges the flames and boulders, and freezes the final Fune when you're directly below it.
