Difference between revisions of "Warehouse Energy Tank Room"
(→Energy Tank: Add video demonstrating the collision oscillator) |
(Bomb strat comparison) |
||
| Line 12: | Line 12: | ||
{{#ev:archiveorg|viptech\kraid%20tank%20bomb.mp4}} | {{#ev:archiveorg|viptech\kraid%20tank%20bomb.mp4}} | ||
| + | |||
| + | This slightly slower strat on the left uses a bomb to conserve ammo while also grabbing the Beetom drops. | ||
| + | |||
| + | {{#ev:youtube|SrmZwoiSQwU}} | ||
= Energy Tank = | = Energy Tank = | ||
Revision as of 06:47, 20 December 2019
| Adjacent rooms | Warehouse Zeela Room | |
|---|---|---|
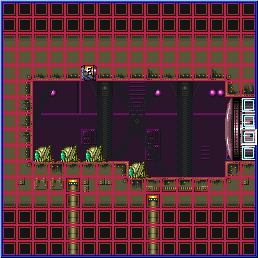
The standard strategy for this room is to get all of the Beetoms to attach to Samus, fire a missile upwards, then shoot upwards to expose the Energy Tank so you can collect it. Then run along the lower part of the room, and jump late through the door transition so you can jump into the narrow passage in the next room.
The fastest strategy, the "Beetomic Bomb", uses a bomb to kill the Beetoms.
This slightly slower strat on the left uses a bomb to conserve ammo while also grabbing the Beetom drops.
Energy Tank
One notable trouble when grabbing the e-tank is that because of the game's Collision Oscillator, if Samus touches the ceiling on the intersection between the energy tank and one of the adjacent tiles, there's only a 50% chance of the game registering Samus as having contacted the tank. You need to touch only the e-tank if you want to avoid this.
