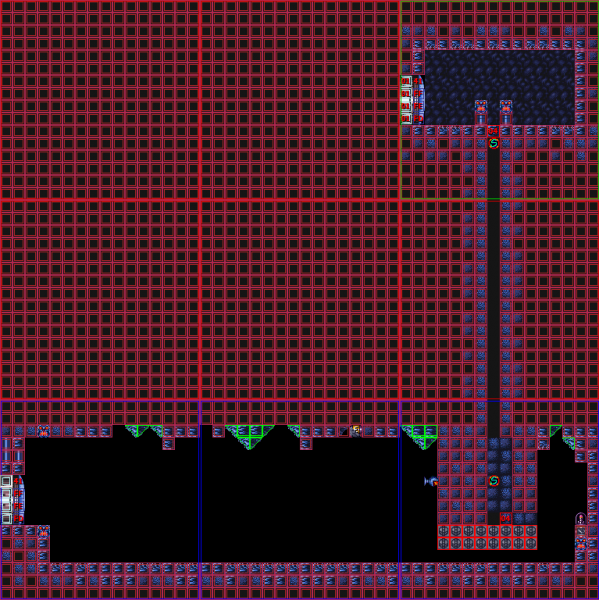
Blue Brinstar Energy Tank Room
| Blue Brinstar Energy Tank Room | |||||
|---|---|---|---|---|---|
| Zone | Brinstar | ||||
| Subzone | Brinstar/Blue | ||||
| Items |
| ||||
| Blue Brinstar Boulder Room Construction Zone |
Adjacent rooms | |
|---|---|---|
Contents
Randomizer
The Tournament randomizer has in logic the ability to damage boost off of the Reo into the energy tank in the ceiling. You can do this by standing just to the right of the energy tank, and doing a full jump shortly before the Reo hits the ground during its swoop.
It's also possible, though slower, to damage boost off of the Geemer moving around the room.
This trick is not generally used in vanilla categories of the game because the enemies do not appear until after Crateria has been awakened -- this requires opening a grey door, which usually happens upon completing the Pit Room. This e-tank would require coming back down the elevator and then coming over, which generally takes more time than it's worth. 100% collects this tank as one of the last items, when you can also visit the Billy Mays Room. Some routes of RBO do use this trick though, see below for details.
RBO
This tank is often collected during the Brinstar item collection phase of the run, after visiting the Morph Ball Room to collect the Power Bombs there. For the easier two-Norfair-visit routes, this will usually be after collecting Hi-Jump Boots, so jumping up to collect it is trivial. For the single-Norfair-visit routes, you will need to use the damage boost listed above.
However, it is possible to collect this e-tank immediately after collecting the first missile pack, using a stationary spinjump, followed by a CWJ, aiming down to compress Samus' hitbox, and then changing her pose to expand the hitbox. Each of these last three inputs is frame-perfect, though there are several different setups that will work, each with different input timings that are required.
However, even if you do the correct inputs, there is a 50% chance that the trick will fail, due to the collision oscillator detecting Samus as being in contact with the wrong block.
Due to the difficulty of this trick, it's sometimes colloquially known as the "TAS tank", or alternatively the "Taco tank", after it was discovered that the TASer Taco first developed the trick.
If you succeed on the first attempt, this trick saves more than 30 seconds over collecting it later.
For runners doing a two Norfair visit run, who need additional health for the first hellrun, coming back down the elevator for the dboost strat is about 18 seconds faster than Early Gauntlet.
100%
Run into this room, lay a Power Bomb to destroy the PB blocks, jump up and collect the e-tank. If you lay the Power Bomb against the block hanging down just left of the e-tank, that will destroy just enough of the PB blocks to open the shaft, allowing you to spinjump against the wall of remaining blocks and make it up easily.
Then walljump up the shaft, breaking the block up top with Screw Attack. Screw Attack cannot break bomb blocks out of a walljump without a turnaround, so make sure you do so before hitting the block.
Jump through the door transition so you can land on the invisible platform in the next room.
On the way back down, stand on the crumble block, morph and lay a Power Bomb, then collect the missile. Run back out, and perform a mockball on the platform through the door.
