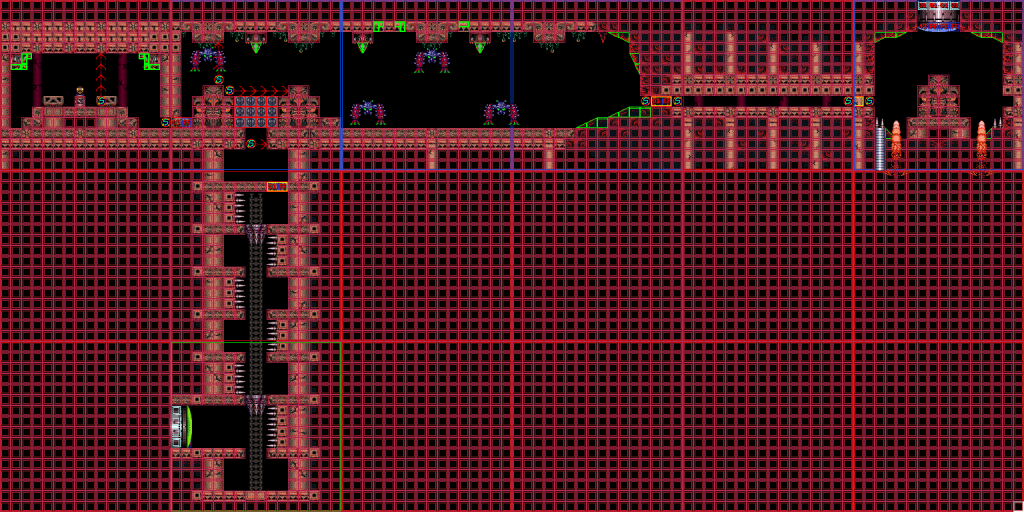
Wasteland
| Wasteland | |||
|---|---|---|---|
| Zone | Lower Norfair | ||
| Subzone | Lower Norfair/East | ||
| Hazard | Heated | ||
| Items |
| ||
| Red Kihunter Shaft | ||
| Metal Pirates Room | Adjacent rooms | |
|---|---|---|
Like all rooms containing hopper or hopper-like enemies (the Dessgeegas), the RNG value gets set to a fixed value in the door transition, and then starts cycling as normal. So if your movement through the room is consistent enough to bring the Dessgeegas on screen on the same frame each time, their movement patterns will be the same.
If you enter this room with no Power Bombs, your odds of getting one by killing all four Dessgeegas is about 7.6%.
All Categories
Entering
Dessgeega rng manipulation - by laying bombs in the same position every time, you can get the second dessgeega to jump high every time. This allows you to roll under both of them without taking any damage.
The earliest that you can lay a Power Bomb and have it destroy enough blocks to allow you down is the second "flower" texture on the floor.
If you want to get through the lower part of this room with no health cost, you'll need to wait for the Kzans to drop down in turn. Once the first Kzan starts rising back up, you can hold left against it without taking any damage, in order to drop down as soon as possible.
You can speed up this room by kagoing through the Kzans. The first kago saves the most time, so many runners will be content with waiting for the second Kzan to drop.
If you can kago during the iframes from the wall spikes, you will only take 15 damage instead of 50. This strat was first demonstrated by Dbx.
If you can kago through both Kzans that will save additional time. One setup will use two sets of wall spikes to generate the iframes necessary, and this setup also happens to fix the door transition, so that you don't need to jump through it to fix it.
If you bomb the blocks efficiently and simply roll left out of the morph tunnel, you can get through taking at most one hit, from the third Dessgeega, if you miss the window for the RNG manipulation (see the video description for details on the manipulation). This is less efficient than mockballing through or using the Plasma hitbox, but it is fairly safe.
Any%
Exiting
The optimal strat for any route of Any% is to walljump into the top-left corner underneath the second Kzan, and lay a power bomb against the ceiling. As the Kzan drops down, run right and jump up, and lodge yourself between the statue and the 1-tile thick ceiling of Power Bomb blocks that remain, similar to the ceiling clip in Wrecked Ship Main Shaft. As a Dessgeega comes overhead, clip through the ceiling and damage boost off of it. Then use the i-frames to short-charge a speedball, allowing you to go through both sets of bomb blocks on the right. Open the door, jump through it, and morph, so you can lay a bomb early in the next room.
For Any% KPDR, if you're not consistent with the ceiling clip, you can go to the right side of the Kzans' track, and then lay a power bomb in mid air high enough to destroy all of the Power Bomb blocks. Then you can fire a charged shot upwards in case the first Dessgeega is there, fire a second charged shot right to kill two of the Dessgeegas, and fire a third charged shot right, just before you start the short charge for the speedball.
If you're inconsistent with the speedball, then you'd likely be faster taking a hit from the Dessgeegas and just getting to the right side of the room as fast as possible.
Low% Ice
This video discusses the variation of the clip strat available for Low% Ice:
