Difference between revisions of "Beta Power Bomb Room"
(100% strats) |
m |
||
| (3 intermediate revisions by 2 users not shown) | |||
| Line 1: | Line 1: | ||
| + | {{Infobox room | ||
| + | |zone = Brinstar | ||
| + | |subzone = Red | ||
| + | |visible = 1 | ||
| + | }} | ||
{{Adjacent rooms | {{Adjacent rooms | ||
|east=[[Caterpillar Room]] | |east=[[Caterpillar Room]] | ||
| Line 7: | Line 12: | ||
== 100% == | == 100% == | ||
| − | + | The fastest strats involve using a [[Blue Suit Glitch#Temporary|temporary blue suit]] to kill the hoppers to reduce lag before the power bomb goes off. | |
| + | |||
| + | {{#ev:youtube|ik0wfjkwBAU}} | ||
| + | |||
| + | Slightly slower due to the shinespark crash, perform a [[short charge]] (a 2-tap will be sufficient, maybe even a 1-tap). After charging it on the left corner, morph, lay a power bomb, and diagonal spark to the right to kill the hoppers. | ||
| + | |||
| + | {{#ev:youtube|N9YYWmLlHv8}} | ||
The backup strat is to get to the left side, lay the power bomb, and stay morphed. As you fall down, bounce off of the grey block before going down the hole. If you go straight down, the power bomb will not hit the hoppers a second time to kill them. | The backup strat is to get to the left side, lay the power bomb, and stay morphed. As you fall down, bounce off of the grey block before going down the hole. If you go straight down, the power bomb will not hit the hoppers a second time to kill them. | ||
| + | |||
| + | {{#ev:youtube|ojzh3VtwQdM}} | ||
After collecting the power bomb pickup, you can damage boost off of the ceiling spikes to get back right to the remaining part of the platform. | After collecting the power bomb pickup, you can damage boost off of the ceiling spikes to get back right to the remaining part of the platform. | ||
Latest revision as of 08:18, 26 November 2023
| Beta Power Bomb Room | |||
|---|---|---|---|
| Zone | Brinstar | ||
| Subzone | Brinstar/Red | ||
| Items |
| ||
| Adjacent rooms | Caterpillar Room | |
|---|---|---|
100%
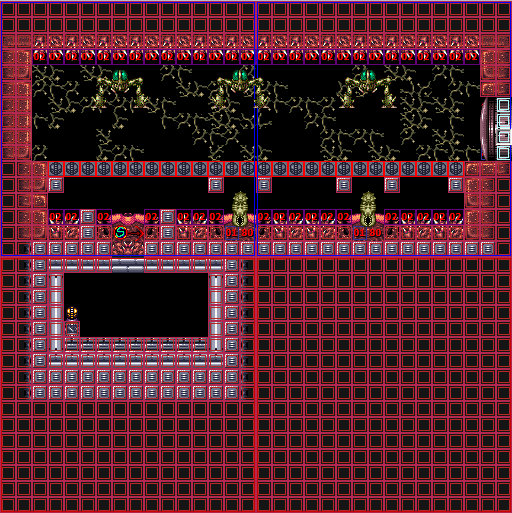
The fastest strats involve using a temporary blue suit to kill the hoppers to reduce lag before the power bomb goes off.
Slightly slower due to the shinespark crash, perform a short charge (a 2-tap will be sufficient, maybe even a 1-tap). After charging it on the left corner, morph, lay a power bomb, and diagonal spark to the right to kill the hoppers.
The backup strat is to get to the left side, lay the power bomb, and stay morphed. As you fall down, bounce off of the grey block before going down the hole. If you go straight down, the power bomb will not hit the hoppers a second time to kill them.
After collecting the power bomb pickup, you can damage boost off of the ceiling spikes to get back right to the remaining part of the platform.
