Difference between revisions of "Wrecked Ship Main Shaft"
m (→Block Clip: Corrected "L" to "angle down" for reference for those who use other control schemes.) |
m |
||
| (5 intermediate revisions by 3 users not shown) | |||
| Line 1: | Line 1: | ||
| + | {{Infobox room | ||
| + | |zone = Wrecked Ship | ||
| + | |theme = Wrecked Ship | ||
| + | |hazard = Powered | ||
| + | |visible = 1 | ||
| + | }} | ||
{{Adjacent rooms | {{Adjacent rooms | ||
|north=[[Attic]] | |north=[[Attic]] | ||
| Line 15: | Line 21: | ||
This is most useful in categories that do not have the [[Wave Beam]] by this point in the run, like [[Any%]] PRKD or [[Low% Ice]]. For Any% KPDR or [[100%]], this may not actually save time at all compared with shooting out the row of blocks and running through. | This is most useful in categories that do not have the [[Wave Beam]] by this point in the run, like [[Any%]] PRKD or [[Low% Ice]]. For Any% KPDR or [[100%]], this may not actually save time at all compared with shooting out the row of blocks and running through. | ||
| + | |||
| + | == KPDR == | ||
| + | |||
| + | === Bottom To Left Side Supers === | ||
| + | |||
| + | One of the fastest and most consistent strats for this section avoids taking out the middle blocks, and uses them as a morph tunnel rather than bombing up to the top and waiting for the explosion. Three specific [[Wave Beam]] shots are used. | ||
| + | |||
| + | {{#ev:youtube|DcQqLuzBoDc}} | ||
| + | |||
| + | [https://www.youtube.com/watch?v=qs4aYBzVrtM Wrecked Ship Shaft Bottom (3 shot, no bomb strat) tutorial from AnotherFastSamus] | ||
| + | |||
| + | === Main Shaft Climb === | ||
| + | |||
| + | This climb is a series of jumps and grabs, with some varying strats for dealing with the middle [[Atomic]]s and blocks. How the top part is performed will often be determined by the intended entry to [[Attic]]. | ||
| + | |||
| + | {{#ev:youtube|cFIvwnGbE7s}} | ||
| + | |||
| + | == 100% == | ||
| + | |||
| + | This is the fastest method to get from [[Sponge Bath]] to [[Attic]]. | ||
| + | |||
| + | {{#ev:youtube|lUB308b2zA0}} | ||
== Items == | == Items == | ||
* [[List of Missiles#Wrecked Ship 1|Wrecked Ship Missile 1]] | * [[List of Missiles#Wrecked Ship 1|Wrecked Ship Missile 1]] | ||
Latest revision as of 22:00, 26 November 2023
| Wrecked Ship Main Shaft | |||
|---|---|---|---|
| Zone | Wrecked Ship | ||
| Hazard | Powered | ||
| Theme | Wrecked Ship | ||
| Items |
| ||
| Attic | ||
| Wrecked Ship Entrance Wrecked Ship West Super Room |
Adjacent rooms | Wrecked Ship Save Room Sponge Bath Wrecked Ship East Super Room |
|---|---|---|
| Basement |
Block Clip
To pass through the floor on the way to the attic, break only the top block of a vertical pair. Jump into this space and press angle down. You'll notice your feet are in the block. Jump to pass through the floor above you.
This is most useful in categories that do not have the Wave Beam by this point in the run, like Any% PRKD or Low% Ice. For Any% KPDR or 100%, this may not actually save time at all compared with shooting out the row of blocks and running through.
KPDR
Bottom To Left Side Supers
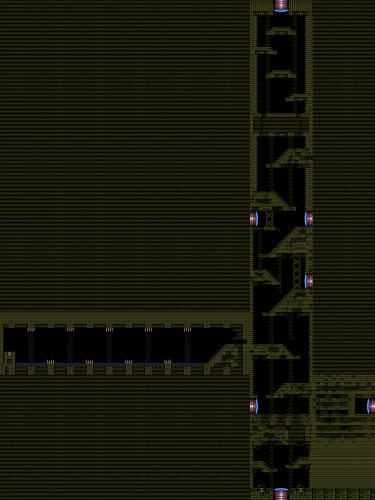
One of the fastest and most consistent strats for this section avoids taking out the middle blocks, and uses them as a morph tunnel rather than bombing up to the top and waiting for the explosion. Three specific Wave Beam shots are used.
Wrecked Ship Shaft Bottom (3 shot, no bomb strat) tutorial from AnotherFastSamus
Main Shaft Climb
This climb is a series of jumps and grabs, with some varying strats for dealing with the middle Atomics and blocks. How the top part is performed will often be determined by the intended entry to Attic.
100%
This is the fastest method to get from Sponge Bath to Attic.
