Difference between revisions of "Post Crocomire Jump Room"
From A complete guide to Super Metroid speedrunning
m (Added Smile RF Screenshot) |
(100% strats) |
||
| Line 5: | Line 5: | ||
[[File:PostCrocomireJumpRoomSmile.png|x600px]] | [[File:PostCrocomireJumpRoomSmile.png|x600px]] | ||
| + | |||
| + | == 100% == | ||
| + | |||
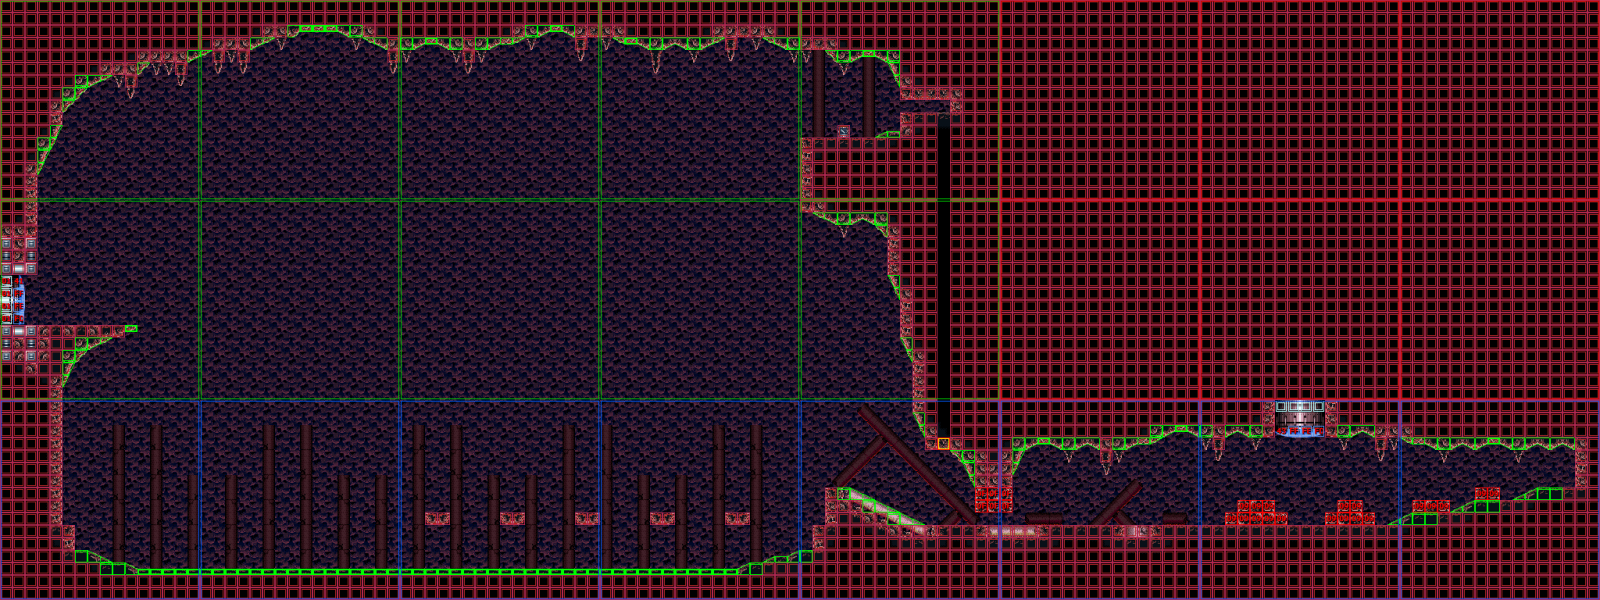
| + | The optimal strategy is to run off of the ramp, shoot the door in mid-air, and mockball through. Then coming back, use the Grappling Beam to swing over to the missile pack. | ||
| + | |||
| + | An alternative strategy is to shinespark to the missile platform before dropping down and jumping to the Grappling Beam Room door. The missile platform overhangs the ramp, so the shinespark will need to be activated mid-air. After getting the Grappling Beam, an appropriately-timed jump will allow for a mockball under the speed blocks and [[Mella|Mellas]], while avoiding the Rippers. | ||
== Items == | == Items == | ||
* [[List of Missiles#Norfair 11|Norfair Missile 11]] | * [[List of Missiles#Norfair 11|Norfair Missile 11]] | ||
Revision as of 03:27, 25 October 2018
| Post Crocomire Shaft | ||
| Grapple Beam Room | Adjacent rooms | |
|---|---|---|
100%
The optimal strategy is to run off of the ramp, shoot the door in mid-air, and mockball through. Then coming back, use the Grappling Beam to swing over to the missile pack.
An alternative strategy is to shinespark to the missile platform before dropping down and jumping to the Grappling Beam Room door. The missile platform overhangs the ramp, so the shinespark will need to be activated mid-air. After getting the Grappling Beam, an appropriately-timed jump will allow for a mockball under the speed blocks and Mellas, while avoiding the Rippers.
